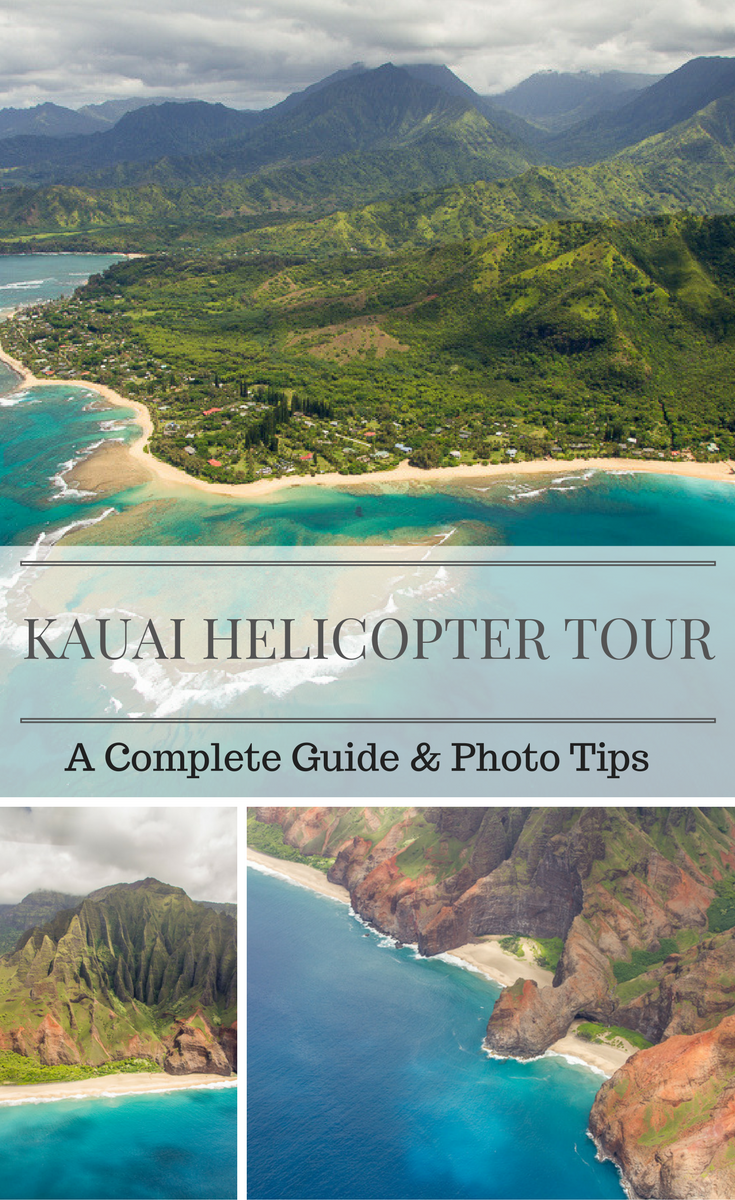
Kauai helicopter tour: a complete guide and photos tips
As a traveller, do you tend to go back to places you loved, or do you travel to new destinations? Tough question, isn’t it? We usually prefer to explore new places – our planet is so big! However this time, it’s different. We came to Hawaii a few years ago but only had time to visit the main island: Oahu. And while some places are great, it didn’t really meet the high expectations we had for Hawaii. So we decided to give it another go. And we’re so happy we did!
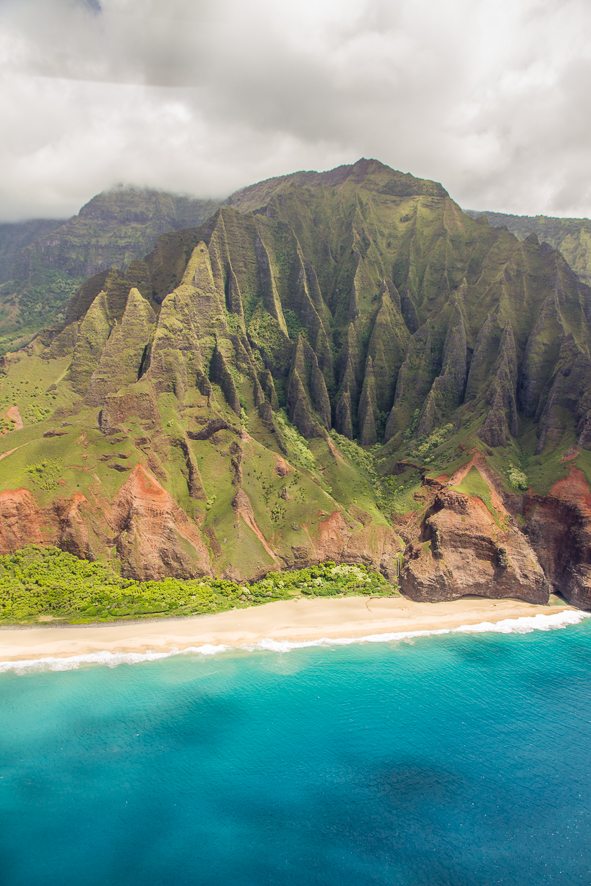
This time, we went to Maui and Kauai. Black sand beaches, sunset above the clouds, amazing banana bread, 2 days trekking in landscapes out of this world, and to finish on a high note, a helicopter tour over the Napali Coast.
If you’re reading this, then you’re looking for the last bit of information to push you over the edge (not literally of course :D) and get all the tips you need to make the most out of this once in a lifetime experience.
So why do it?
- First flight in a helicopter? You’ll love the views as much as the experience itself. There’s nothing like a vertical take off!
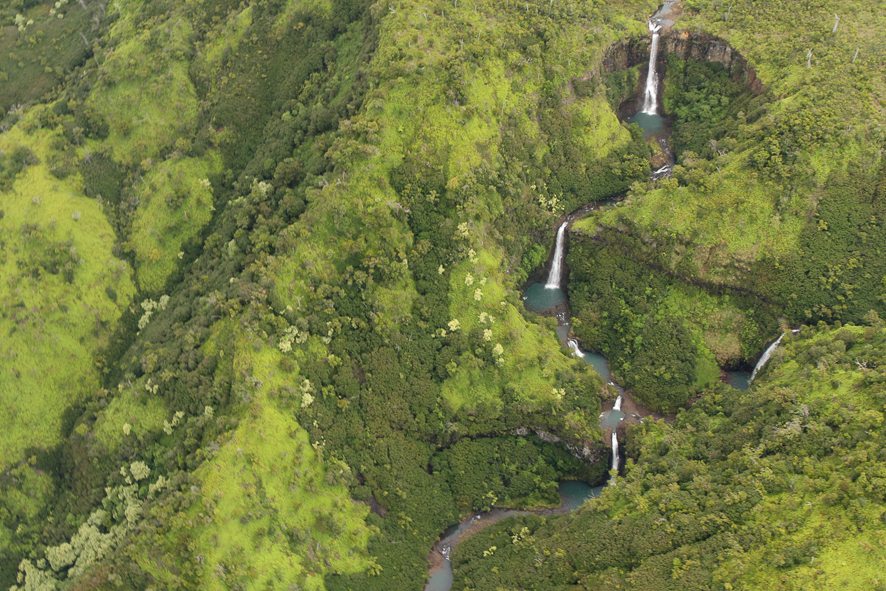
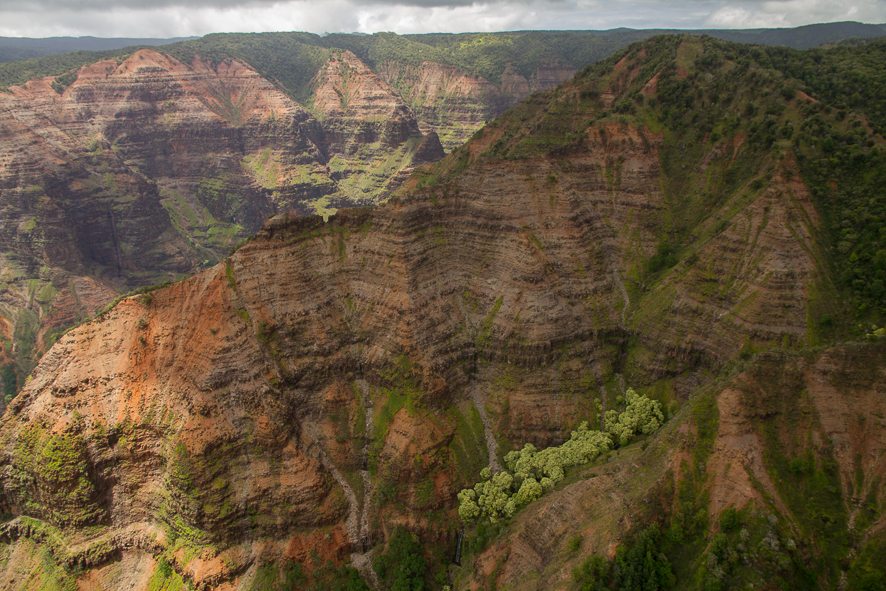
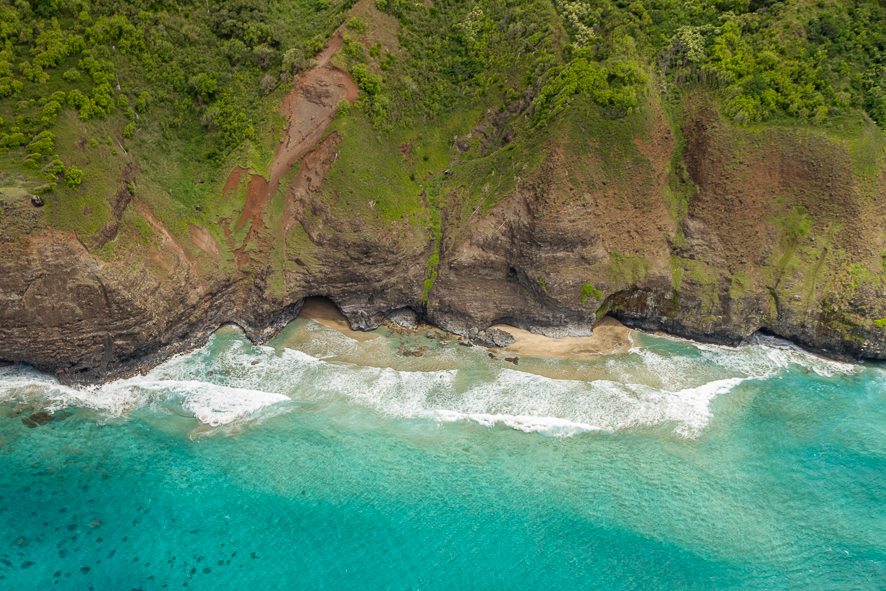
- Amazing view on hidden waterfalls and gorgeous valleys that can only be seen from the sky.
- Get a greater sense of the island and how magical it is.
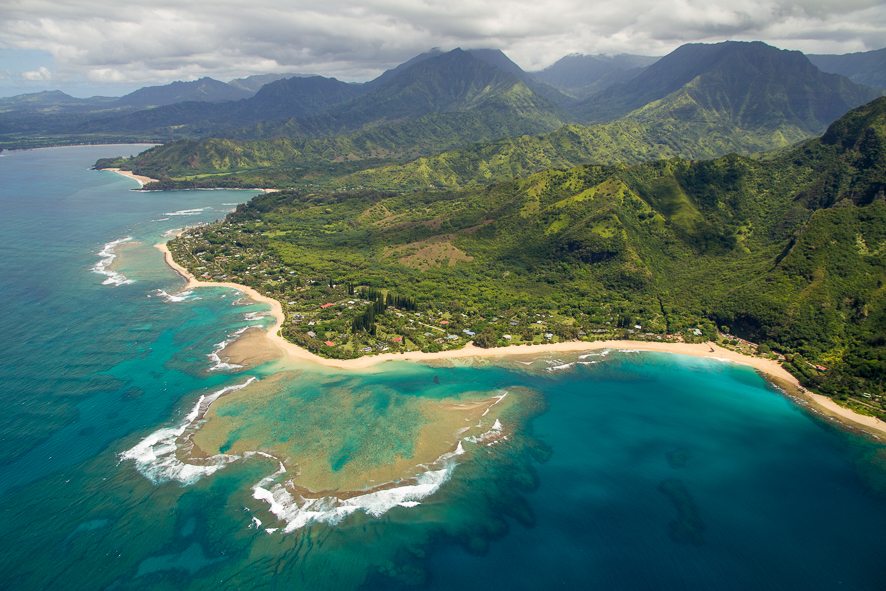
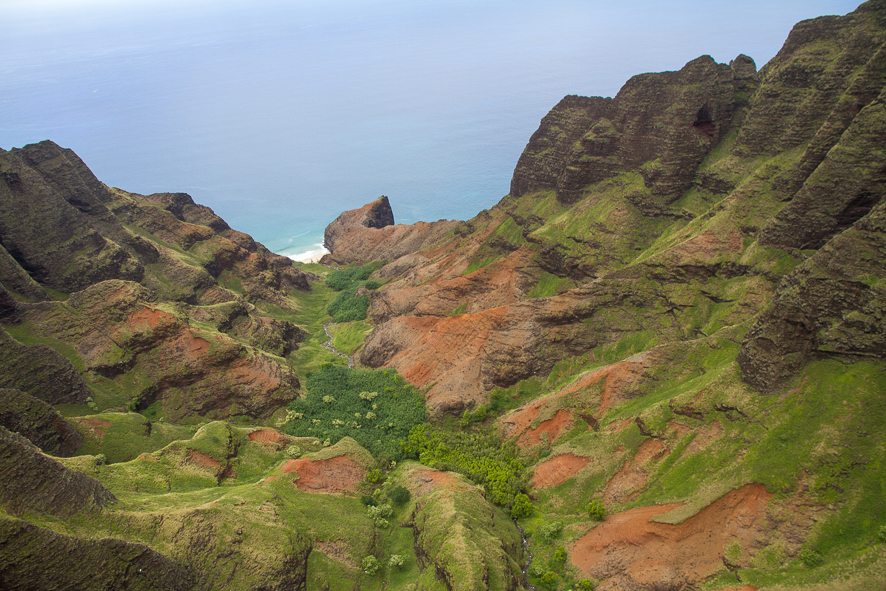
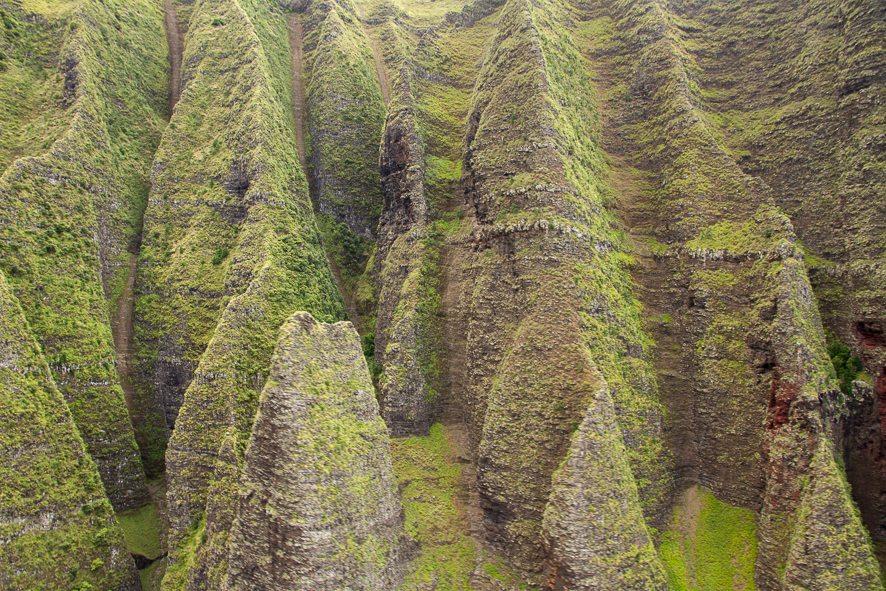
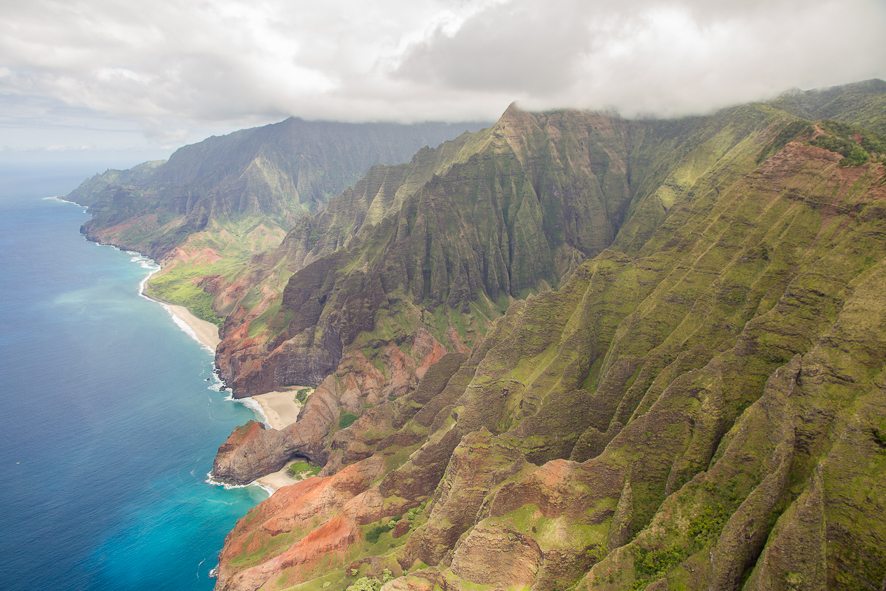
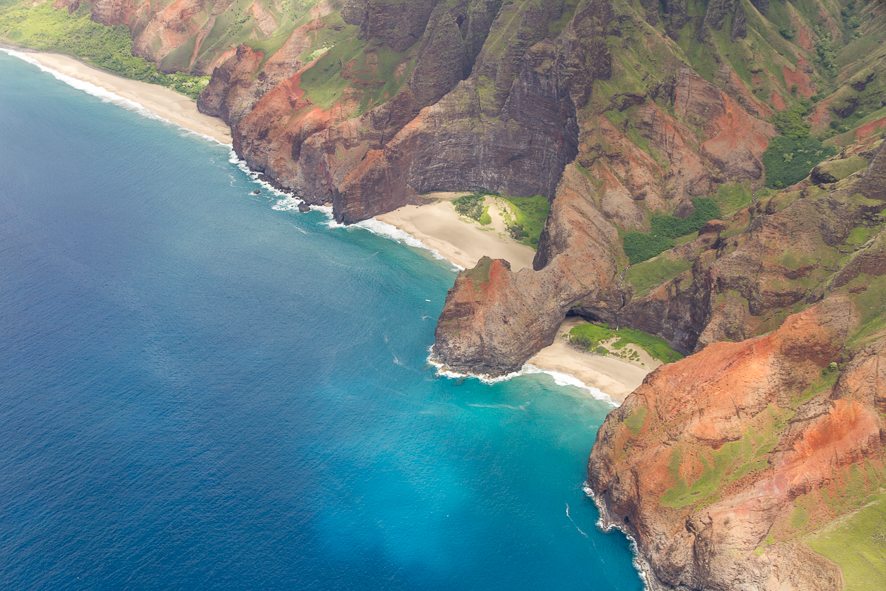
- Kauai has some of the most spectacular views in the world, especially when it comes to the Napali Coast. We hiked 35km (22 miles) over 2 days and were wowed. But I can guarantee you that seeing it from a helicopter was even more incredible
Ok, now that you’re ready to go, here’s a step-by-step guide on how to make the most of it.
1. Choosing the company and getting the best seats
Let’s be honest, a helicopter tour isn’t that cheap. That’s why it’s important to take the time to choose the best company for you. Here’s what we recommend you pay attention to.
- Number of passengers on the flight
Some companies offer tours for 6 passengers which means that you might end up in the middle (you can’t really choose your seat as they’re assigned based on weight). And that means no direct access to the window. From there, it’s harder to get the best view or best shots. That’s at least what the Canadian couple we met on Kauai told us about one of their past experience.
The second option is a private tour. It can be a bit more expensive, however, you’re guaranteed to get the best seats with incredible views on the Napali Coast. You also have the option to ask your pilot to go over that waterfall again if you feel like you missed your perfect picture.
And certain companies require a minimum number of passengers to fly. Otherwise your flight can get cancelled at the last minute. Check their policy. On a private tour, flights only get cancelled because of bad weather.
- Doors on or off?
It’s really up to you but here’s why we recommend the doors-off option:
- It feels more adventurous.
As soon as the helicopter takes off, you’ll feel right in the heart of the action. Seeing the ground a few hundred feets below and feeling the air on your face will make the experience unforgettable. - Less chances of getting sick..
Most people will be fine, but if you are subject to motion sickness, the air flowing will help. - Best option for photography.
Without the doors, you’ll have less issues with reflection and distortion, plus you’ll get better contrasts. If you like photography and want to bring the best pics back home, leave the doors at the airport. If you decide to fly with the doors off, you’ll need a strap on every object that you bring onboard (including your mobile phone).
Some companies offer flights especially dedicated to photographers, especially if you want to spend most of your time on a specific location. If it is the case, Mauna Loa offers a great option.
Helicopter tours can be expensive, so selecting the right company is important. Take your time, compare your options and reviews online.
We had an awesome time with Mauna Loa Helicopter Tours and highly recommend them. Our pilot, Guy was very knowledgeable and told us heaps about the island. Check their reviews on tripadvisor.
2. Clothes and getting ready for the flight
What you need to wear will depend on the season. No surprise there. But keep in mind that even if it’s hot on the ground, it’ll be colder when you’re going over 100km/h in the air. Check out the weather forecast and ask your helicopter company for advice on the day.
When we flew in May, a simple rain jacket was enough. It’s a good option as you might encounter a few showers, especially around Mount Waialeale, one of the wettest spots on earth.
If you have long hair, it’s a good idea to tie or braid them.
Finally, if you decide to fly with the doors on, dress in dark colours to avoid reflections as much as possible.
3. Camera lens and settings for aerial photography
If you’re flying doors-off and want to take your phone on the flight (for your Instagram stories for example :D), make sure you buy a cover with a strap. Keep in mind that you won’t be able to change your lens in the air (for obvious security reasons), so pick your favourite lens before take-off (or keep 2 camera bodies with different lenses on each one).
Here’re a few pieces of advice to maximise your chances to take the perfect picture:
- Go with your widest angle (we had our 17-55mm but you can go wider)
- Leave the polarised filter behind. We’re usually big fans of those filters (better contrasts and colours), but with the helicopter’s speed, it’ll be harder to focus as you’ll lose a couple of stops.
- Aperture: it will depend on your lens, but try to find a good compromise between depth of field and light. f/8 is probably a good starting point if you have no idea. Potentially f/6 as with the altitude, the focus point will likely be close to infinity.
- Shutter speed is a crucial parameter for the flight. Choose it based on the light available, trying to set it as fast as possible to minimise the blur generated by the speed and the helicopter vibrations.
- White balance: take it easy, go full auto. Except if you’re a pro photographer 😉
- Tip: deactivate the image preview, the option that shows your pictures on the screen as you take them. It will allow you to shoot faster.
- If your memory card speed allows, shoot in RAW. That way you’ll have more flexibility for post-production.
- You can always change your settings while flying. So remember to check a few pictures and adjust as you go.
Of course, if you want to make the most out of your camera, it’s a good thing to know how it works. Check-out your camera’s user manual, and take the time to know the key settings before you fly. You’ll avoid getting stuck trying to change the camera settings mid-air.
If you don’t want to shoot in full manual, choose semi-auto with aperture priority. We found that it’s the easiest option for beginners.
And finally, we know you want to bring the best pictures home, but don’t keep your nose on your camera and don’t forget to enjoy the flight.
Note:
As a guide, here are the settings we had for most of our best shots that afternoon:
Aperture: f/7
Shutter speed: 1/125 to 1/300
Iso: 100 (auto)
White balance: auto
Size: RAW
Other: no display on screen after taking a picture.
4. In the air: aerial photography tips
- Sit behind the pilot, you’ll see what they see. Our pilot, Guy, was incredible. He made sure we had a great view on every single waterfall. Going on a private tour is definitely your best chance not to miss out on any of the action.
- It goes fast! Once you’ve checked the first few images, shoot non stop, sort later.
- Make sure you have enough battery and enough space on your memory card. FYI, Rafika took about 16GB of photos during our 60-minute flight!
- Also, for more creative shots, you can take pictures of the inside of the helicopter. Capture the controls, the pilot, the front window…
Again, you don’t do this everyday (well… most of us don’t), so don’t forget to have fun :D.
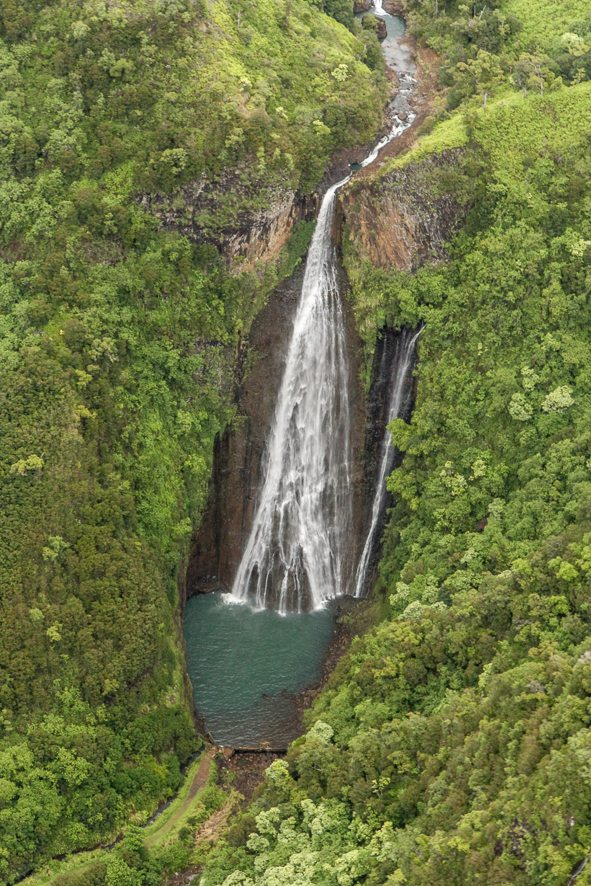
We loved you 60-minute tour with Mauna Loa. Especially when Guy put the Jurassic Park theme song as we were flying over Manawaiopuna, the waterfall appearing in the movie.
The other highlight for us was when we flew very close to the cliffs and could see the 22-mile track that we hiked 2 days earlier.
5. Best time to fly
We struggled finding that kind of information online when we were preparing our trip. It’s true that it depends on many parameters: season, weather on the day, and also… on your luck.
What you need to know if that the light varies based on the time of the day (thanks genius!). And there are advantages and inconvenients for both options. Therefore, the best time for you depends on what you’re most interested in. Let me explain.
- Morning: at this time, the weather is usually calmer, meaning less turbulences. It might be the right option for you if you’re prone to motion sickness. The canyon is usually clear of clouds at this time.
- End of the day: the light is beautiful on the Napali Coast, however, some parts of the canyon as well as some waterfalls will be hidden in the shade. You also increase your chances for bad weather then.
- In between: the sun is high in the sky, so visibility is usually pretty good. But, there’s less shade (not ideal for photography), so the landscape can sometimes feel a bit flat.
We flew at 1.30pm, and we loved it! The light was starting to give depth to the cliffs, and the canyon was still clear and bright. We definitely recommend flying early in the afternoon.
6. Photo processing
When you’re back home, it’s time to sort and filter your photos (not our favourite part of the trip). We use Lightroom for our photo processing, but any software will do the trick.
Here are some very simple improvements we usually do on our photos:
- Select the pics without the helicopter blades (except if it adds something to the picture)
- Crop as necessary – it’s not always easy to get the right angle up in the air.
- Increase the contrast. The mist tends to soften it.
- Modify the exposure if you feel like it’s needed.
7. When you’re done…
Don’t forget to come back here to say hi and tell us how you went 🙂 Also, feel free to leave any of your tips in the comments below.
We chose to finish our trip in Kauai with the helicopter tour. From up there, we could see all the places we went to the days before. It was an amazing ending.
But… it was also a bit risky. It is not unusual for companies to reschedule flights due to bad weather. That’s another reason why we chose to go with Mauna Loa Helicopter Tours: if the weather’s not great, and they think that you won’t have a good time, they will reschedule your flight and that… even if technically they are able to fly.
Some of you might be worried about safety. If it’s the case, you can check safety records on the National Transportation Safety Board site. You’ll get info on the issues that were logged as well as companies involved. Quick reminder: there’s more chances of getting into an accident driving to the airport than flying 😛
We also wanted you to know that we felt very safe and watched a safety procedure video before the tour. You can also decide to fly with the doors on with Mauna Loa if you’re worried.
Voila! We hope that you found our tips useful. If it’s the case, feel free to leave a comment below 🙂
Have a great flight and don’t forget to share this article if you found it helpful.
Many thanks to Mauna Loa Helicopter Tours for hosting us and for the great experience. All views expressed are, as always, our own honest opinion.

Defour
Vous photos sont vraiment tres belles.
Nous partons l’été prochain à hawaï et nous prévoyons un tour en helico à kauai. Je suis photographe amateure et je me demande quel objectif prendre. J’ai un 10-22 non stabilisé, un 24-70 STAB et un 55-250 stab.
Pour mes faire une idée, à quel ficus sont faites vos photos ?
Merci
Chrystele
karim
Hello Chrystele, je te conseille de prendre ton 24-70. Le grand angle serait top mais sans stabilisation, j’ai peur que tes photos soient floues. En plus, le 24-70 te permettra de trouver le bon niveau de zoom. Bon voyage, vous allez vous régaler! 🙂
Joie Gahum
I want to make shots like these too. I just bought and external roadeavour phone lens. Hope it works
karim
Fingers crossed 🙂 We never tried, let us know how you go!